Connecting to a Network for Remote Control
Overview of Network Connectivity
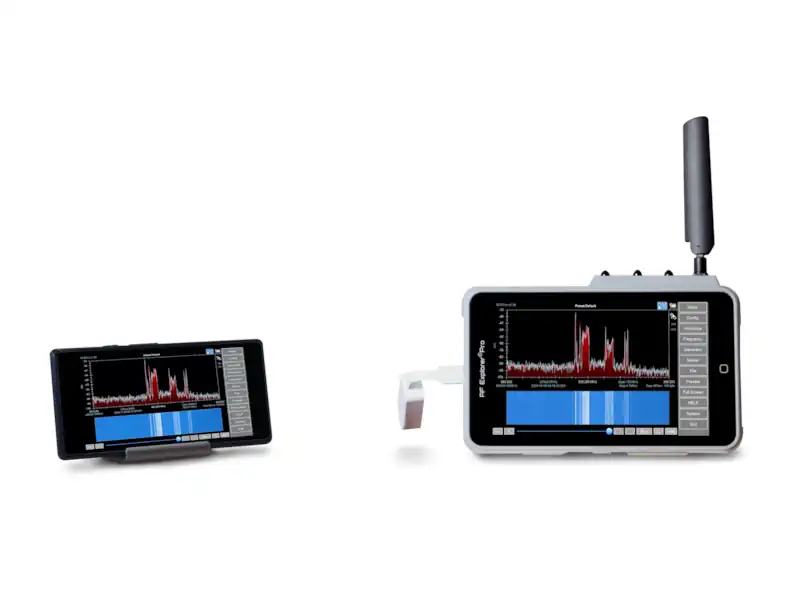
The RF Explorer Pro is a standalone host computer, meaning it cannot be directly connected to a PC via USB like a traditional peripheral. Instead, it requires network access to enable remote operation from a computer, tablet, or mobile device.
To achieve this, the RF Explorer Pro can be connected to a wired network using a USB-to-Ethernet adapter. Once connected, the device can be accessed remotely using VNC (Virtual Network Computing) from any compatible device (Windows, macOS, Linux, iOS, Android).
Best Connection Method
- A wired Ethernet connection is the most stable and interference-free way to access RF Explorer Pro remotely.
- Only the USB 3.0 Type-A port can be used for connecting a USB-to-Ethernet adapter—the USB-C port is not for network access.
- WiFi dongles are not recommended, as they introduce RF interference, affecting measurement accuracy. If a WiFi dongle is necessary, it should be placed at least 2 meters (6 feet) away from the analyzer using a USB extension cable.
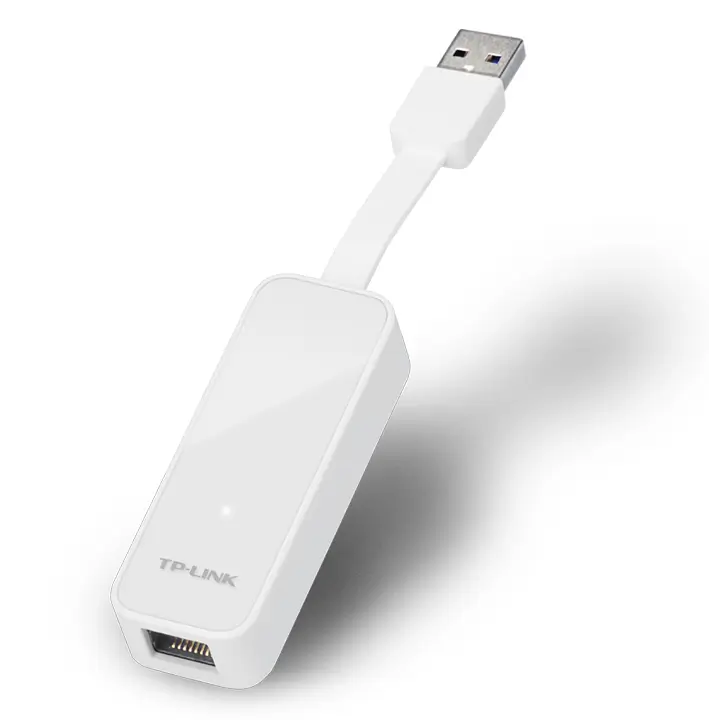
- A recommended USB-to-Ethernet adapter is the TP-Link UE300, which provides reliable compatibility and a plug-and-play experience.
Detailed Connection Setup and Remote Access Guide
Hardware Requirements
To set up network access for RF Explorer Pro, you will need:
- A USB-to-Ethernet adapter (such as the TP-Link UE300).
- An Ethernet cable to connect the RF Explorer Pro to your router or switch.
- A VNC viewer installed on a PC, Mac, Linux, iOS, or Android device (e.g., RealVNC, TightVNC).
- (Optional) A USB hub if additional USB 3.0 ports are needed.
Setting Up the Ethernet Connection
To connect the RF Explorer Pro to a wired network, follow these steps:
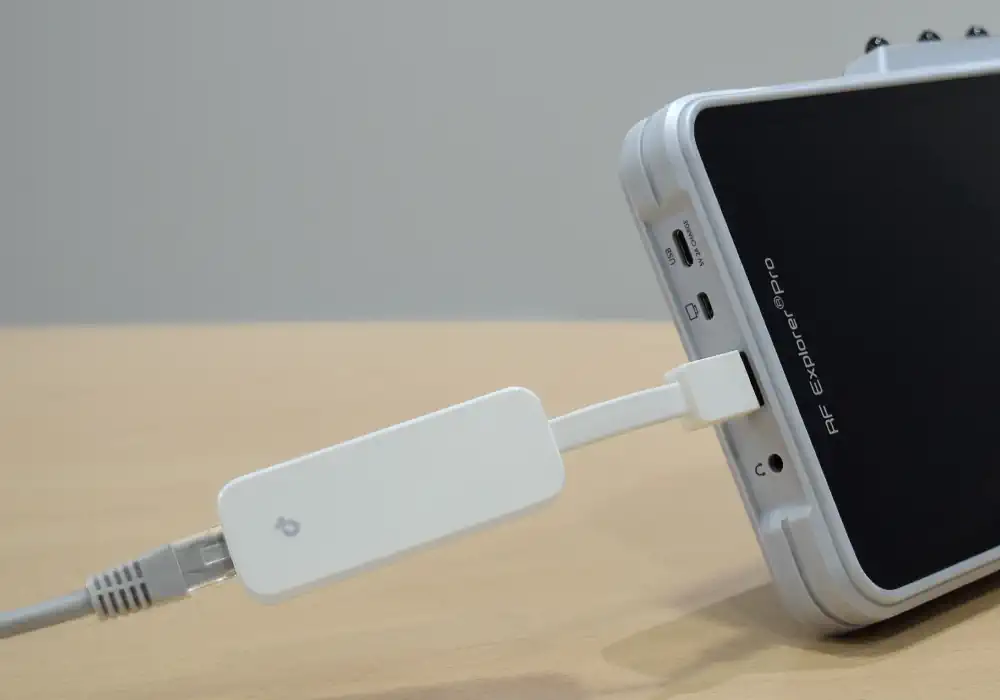
- Connect the USB-to-Ethernet Adapter
- Plug the USB-to-Ethernet adapter into the USB 3.0 Type-A port on the RF Explorer Pro.
- If additional USB ports are needed, you can use a USB hub.
- Connect to Your Network
- Insert an Ethernet cable into the USB-to-Ethernet adapter.
- Plug the other end into your router or network switch for stable network access.
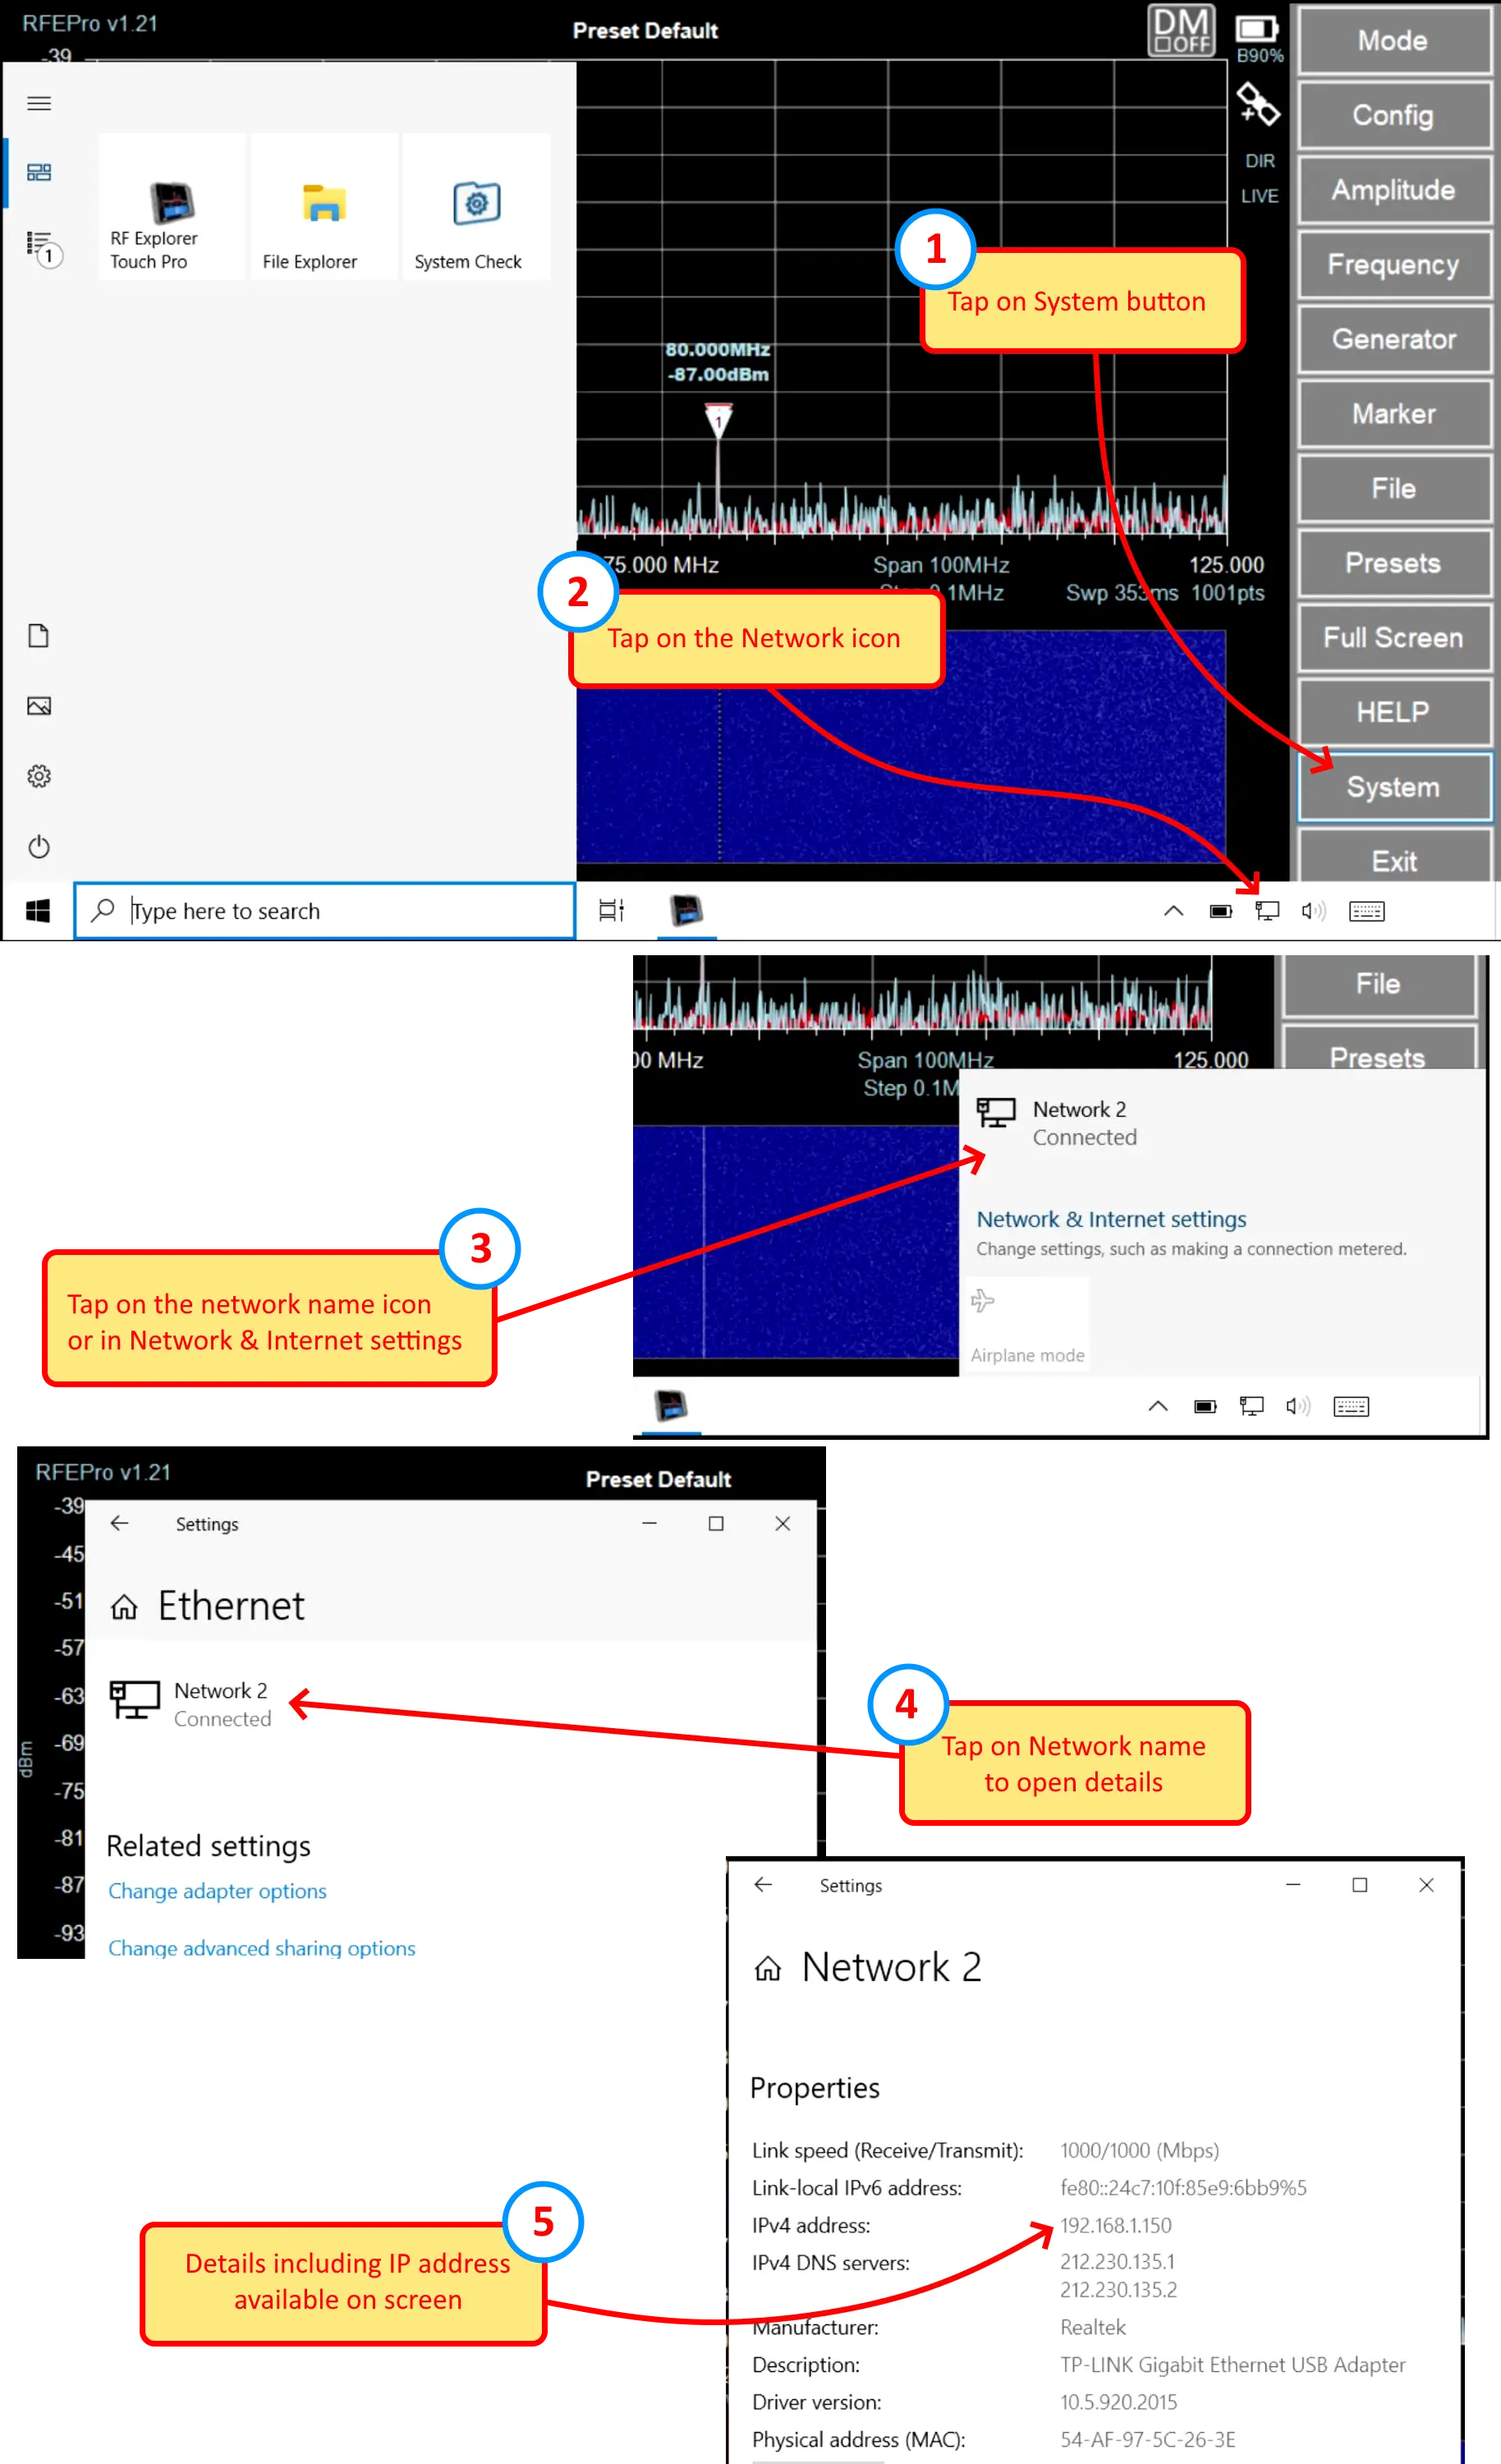
- Verify the Connection in Network Settings
- On the RF Explorer Pro screen, tap the System button (highlighted in the first image).
- Then, tap the Network icon to access network settings (marked as step 2 in the image).
NOTE
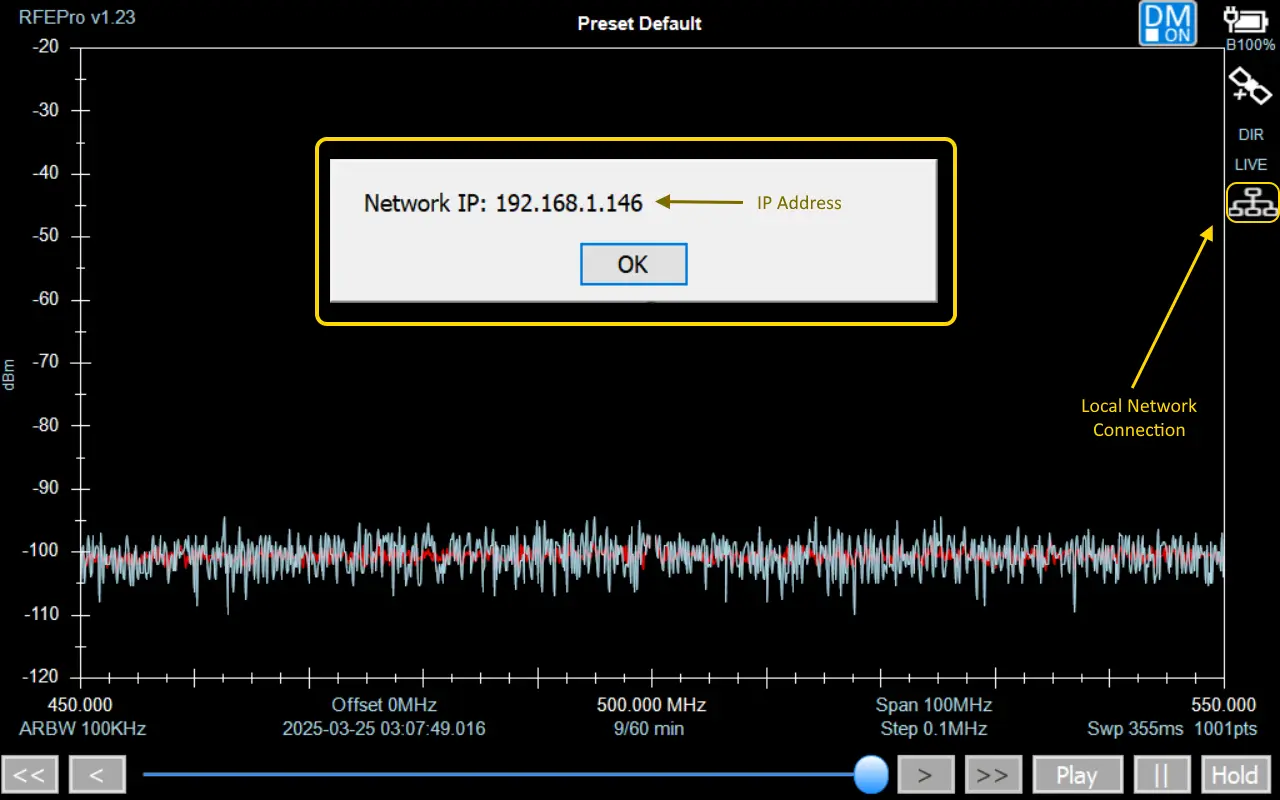
In addition to the method shown in Windows settings, starting from firmware version 1.23, local network IP address can be obtained by clicking on the 'Local Network Connection' icon, as depicted below
Verifying Network Connectivity
Once the network adapter is connected, check if the RF Explorer Pro has successfully joined the network:
- Open Network Details on RF Explorer Pro
- Tap the Network name icon or go to Network & Internet settings (shown as step 3 in the second image).
- Tap on the connected network name to access more details (step 4 in the image).
- Locate the IP address assigned to RF Explorer Pro in the properties section (step 5).
- Confirm Connectivity from a PC
- On a PC connected to the same network, open a command prompt or terminal.
- Type ping <RF Explorer Pro's IP address> and press Enter (e.g. 192.168.1.150 in the image).
- If the device responds, the connection is successfully established, and the RF Explorer Pro is accessible via the network.
Accessing RF Explorer Pro via VNC
- Open a VNC Viewer on Your Remote Device
- Install and launch a VNC viewer such as RealVNC or TightVNC on a PC, Mac, Linux, iOS, or Android device.
- Enter the RF Explorer Pro’s IP Address
- In the VNC viewer, input the RF Explorer Pro’s IP address (previously obtained from the Network Settings).
- Establish the Remote Connection
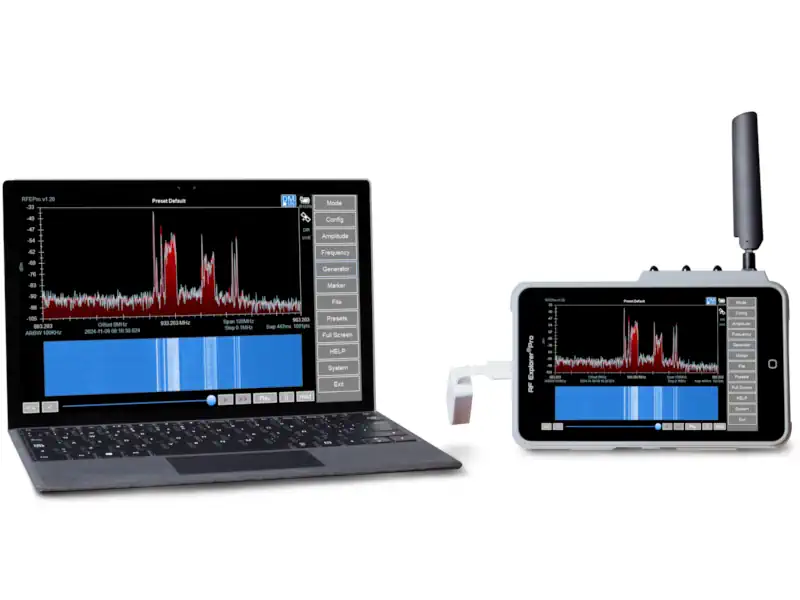
- Once connected, the full RF Explorer Pro interface will be displayed on your screen.
- You can now operate the RF Explorer Pro remotely, just as shown in the image.
Best Practices for Reliable Remote Access
- Use wired Ethernet with quality cable to minimize interference.
- If WiFi is required, use a long USB extension cable to keep the WiFi dongle away from the RF Explorer Pro to reduce RF interference.
- Ensure the USB-to-Ethernet adapter is properly connected and detected by the RF Explorer Pro before attempting VNC access.
- Be aware that no password is set by default on the RF Explorer Pro’s VNC server. This means anyone who knows the device's IP address can connect to it.
- If security is a concern, you can:
- Set a VNC password to restrict access.
- Limit access to specific IP addresses by configuring firewall rules on your network.
- Always verify that your network settings are correctly configured and that your RF Explorer Pro is assigned a stable IP address to avoid connectivity issues.