
Using Network Analyzer functionality
RF Explorer Signal Generator enables advanced Network Analyzer functionality (SNA) when a RF Explorer Spectrum Analyzer is connected to the same computer. This is an advanced feature, used to identify Insertion Loss/Gain vs Frequency to fully identify S21/S12 scalar response of a 2-port RF device. These include filters, amplifiers, terminated couplers, etc.
In this self contained, 5 minutes tutorial video, you can learn how to measure frequency response of a 2-port RF device such as band pass filter. The same process can be used to measure any other RF device.
What you will learn:
- How to measure response of a band pass filter, including all RF connections required and RF Explorer for Windows
- The same process can be used to measure any 2-port RF device.
What you need:
- RF Explorer Spectrum Analyzer model for the frequency required for test
- RF Explorer Signal Generator RFE6GEN
- Quality RF cables
- SMA wrench (8mm or 5/16")
- Device Under Test (DUT)- in this case we will use a 1675MHz BPF
Video Best viewed in HD 1920x1080 full screen
Definitions
- Normalization: This is standard SNA requirement to rule out any cable, connector or environmental imperfection. The application will properly measure the response of your setup and will consider that 0dB response in order to refer any measurement to it.
- DUT: Device Under Test. It is the standard term to refer to the RF device being tested. The DUT can be an amplifier, a filter, etc. Any DUT will require the same steps and can be considered a 2-port black box.
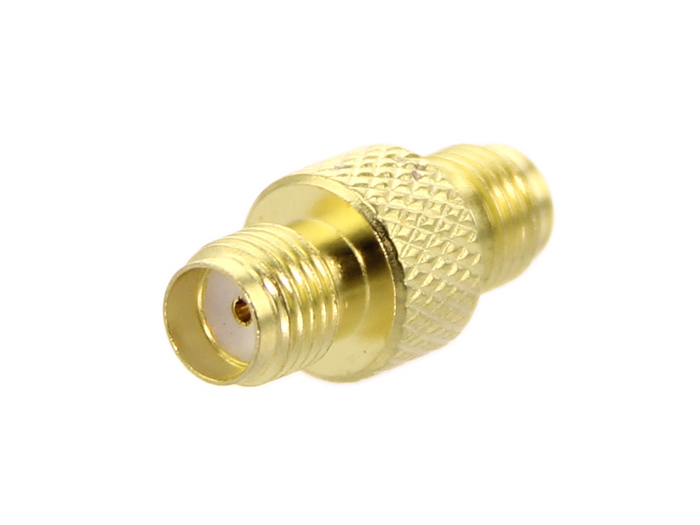
- SMA Gender: SMA connectors (as most RF connectors) can be male or female. Male is the one with a center pin connector, and female is the one with center hole connector. The gender of the RF Explorer units is standard SMA female, whereas DUT can be any gender. In order to connect RF Explorer Signal Generator on the input of the DUT, and RF Explorer Spectrum Analyzer to the output of the DUT, you need quality cables and connectors. The higher the frequency, the more critical is selecting quality cables, adapters and connectors. We suggest quality 6GHZ semi-rigid cables we offer from SeeedStudio and other distributors (click on images below for more details). You may also need a Female-Female adapter as pictured below when normalizing a DUT response that is Male-Male gender. Warning: Using low quality, long cables may significantly reduce repeatability and resolution of your measurement.


Procedure summarized
![]()
- Select the START / STOP frequencies to sweep, and the number of steps. The more steps you use, the longer the sweep will take. Recommended values are from 50 - 200 steps for a good compromise of speed and resolution.
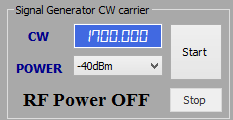
- Select power: By default you should select -30dBm in the CW power value, that is good for most testing. However, if you are using an attenuated line for normalization and test (e.g. attenuator is in series for some reason, or using a Directional Coupler for reflection / SWR) then increase to -10dBm or more. On the other hand, if the normalization connection is amplified (e.g. with mixer or amplifier of some sort) then decrease to -40dBm. As a general rule, you should select a power level that feeds the Analyzer input port at -25 to -35dBm ideally, as that is the best compromise between high power to reduce environmental noise and still being in the linear range of the analyzer.
- First step is normalizing the setup response. To proceed with normalization, you need to use the exact same cables, connectors, adapters and everything you will use with the DUT, except the DUT itself. Sometimes you may need an adapter to plugin both cable ends if the DUT is Male-Male, use a suggested adapter above in that case. Click on [Normalize SNA] and wait a few seconds for the tool to alert on the normalization step is done. The RF Explorer Spectrum Analyzer unit will show TRACKING in clear text and no other functionality is available while SNA is working.
- Once normalization step is done, you can now connect the DUT and click on [Start SNA] for continuous tracking sweep. Screen will be updated with SNA results every few seconds.
- Important: Do not change START/STOP/STEPS configuration or otherwise you would need to Normalize again. Normalization is valid for a specific setup and needs to be done again if modified. For instance selecting a different number of steps or frequency range or power, will immediate clear normalization data and Start SNA button will be disabled to force a new normalization.
- Click on [Stop SNA] to stop tracking anytime.