Overview
RF Explorer Signal Generator tool is currently available in two models:
- RF Explorer Signal Generator baseline – 23.4MHz – 6000MHz
- RF Explorer Signal Generator Combo – 100KHz – 6000MHz
Both models can be used standalone, as well as connected to a computer for easy operation.
Computer control can be achieved by any of these free software options:
- RF Explorer Signal Generator Tool: It works in Windows, MacOS and Linux offering simple yet powerful interface for CW operation.
- RF Explorer for Windows: It is supported in Windows only, and support all kind of advanced operation including CW, Sweep and Tracking SNA.
- Programming interface: You can deliver custom solutions by using Python or .NET libraries, as well as direct USB interface calls through any major language.
This article describes the use of the RF Explorer Signal Generator Tool in all supported platforms.
Installation
- Microsoft Windows:
- Download and install from download page.
- Silicon Labs USB drivers are required.
- Apple MacOS:
- Download and install from download page.
- Silicon Labs and Mono libraries are required, visit this article.
- Linux:
- Download and install from download page.
- Download and install Mono for your Linux distro from Mono project website
- Add your linux user to the dialup group, otherwise may not be able to open the USB port. For instance this command will do it in Ubuntu/Debian:
sudo adduser <my_user> dialout - Copy RF Explorer Signal Generator Tool for Linux executable, you can locate it anywhere in your computer.
- Connect your RF Explorer signal generator to the USB port.
- Run the tool with
mono RFExplorerGeneratorLinux.exe - Note: use regular Linux login, not root or superuser, otherwise configuration files will not be stored in the home folder correctly.
Quick start guide

- Connect your RF Explorer Signal Generator device to USB and keep it in main generator screen. Only one device can be connected to USB, otherwise the tool will not be able to automatically connect with RF Explorer device.
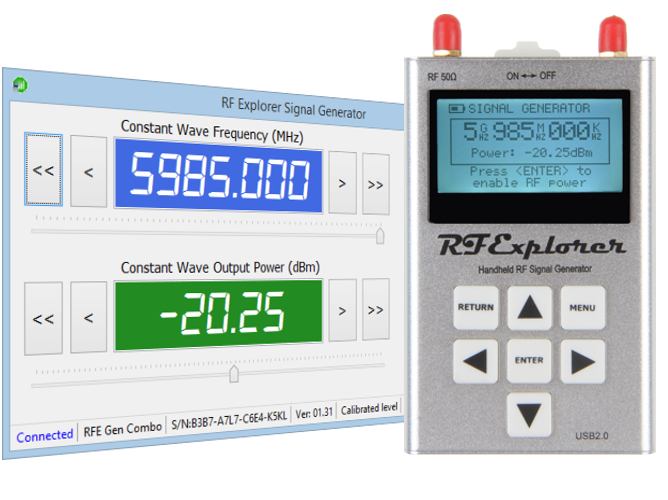
- Open the RF Explorer Signal Generator Tool, it will automatically connect to RF Explorer and indicate model, S/N and status.
- Select CW frequency and power level as needed, using numeric keyboard, or slide controls.
- Click on [Enable RF Power Output] to active the RF power output in the Signal Generator device. Important: Enable output power only if the generator has a load connected.
- Click on [Disable RF Power Output] to stop RF power from the Signal Generator device.
Main screen
The main screen is a compact, convenient display of all operational parameters. Controls are large enough to be operated in a touch screen if required.
The first edit area is for CW frequency. It can be edited in multiple ways:
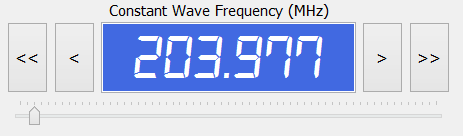
- Direct numeric edition over the value in MHz using keyboard.
- Using [<] button for small frequency decrease, or [>] for small frequency increase.
- Using [<<] button for large frequency decrease, or [>>] for large frequency increase.
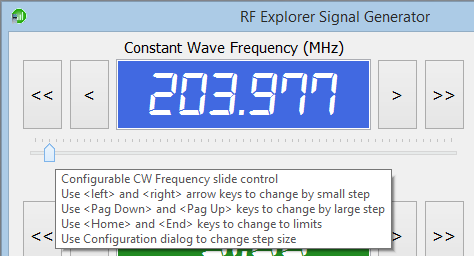
- Using the Slider control, either with keyboard using <left>,<right> and <Pag Down><Pag Up>, or direct slide control with mouse or touchscreen
- Values for small and large increment are configurable.
The second edit area is for Power output in dBm. It can be edited in equivalent ways as with frequency, with some specifics depending on the Signal Generator model connected:
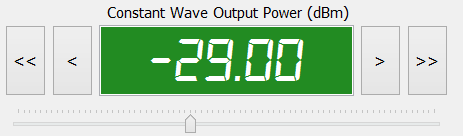
- For Signal Generator baseline model, only 8 predefined power levels are available. Doing direct edits over numeric control will adjust to the closer power level available. Doing small or large increments is predefined and cannot be changed.
- For Signal Generator Combo model, any large and small step can be configured within available power ranges. Minimum possible step is 0.25dB.
Tooltips area available by navigating the mouse over any control to help remember all options:
Advanced Configuration
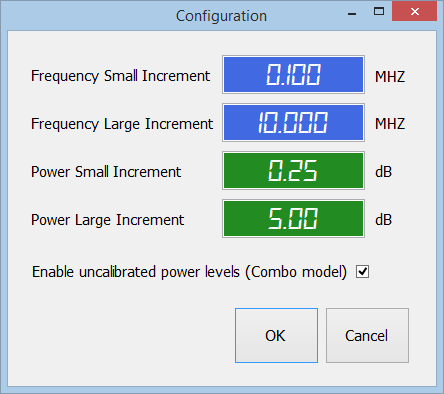
The tool can be easily configured to adjust different parameters:
- Frequency Small and Large Increment defines the step for [<] [>] and [<<] [>>] frequency buttons respectively on main screen. It also defines <left> <right> and <Pag Down> <Pag Up> keyboard keys acting on the slider control.
- Power Small and Large Increment defines the step for [<] [>] and [<<] [>>] power buttons respectively on main screen. It also defines <left> <right> and <Pag Down> <Pag Up> keyboard keys acting on the slider control.
- For Combo models, you can specify whether amplitude ranges offered should be limited to calibration limited ranges, or should include uncalibrated range as well.
Manual USB connection
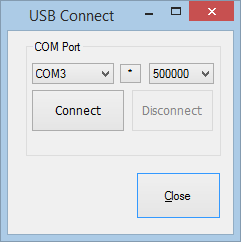
If the Signal Generator device is not the only RF Explorer device connected to USB when loading the application, or if you need to manually connect it anytime, please use the [Connect USB device] button
- Click on [*] to refresh available USB ports. Note different platforms may display the USB port name differently. For instance Windows may display it as COMx whereas MacOS and Linux may show a USBx name.
- Click on [Connect] to stablish connection to the device.
- Use [500000] baud speed only.